How to Make Summer Sand Art
 Summer is in full swing, and this one has certainly been a hot one! If a beach vacation is in your plans this month, you have a wonderful opportunity to create a one-of-a-kind souvenir. Summer sand art is a beautiful way to preserve those sweet sunny memories year-round. First, collect your sand. Fill gallon Ziploc bags with as much sand as you desire.
To tint your sand, pour some liquid watercolor into the bags and mix it around so all the sand is the same color. You’ll want to divide your sand into one bag per desired color.
Now pour the sand onto trays to dry in the sun. This will take hours; remember to go out and mix the sand around occasionally. If you are in a non-sunny place, the sand will dry inside, it just might take longer.
Once the sand is dry, put each color into a container. Now you are ready to make your sand art! These are also a wonderful craft to make with children.
How To Make Sand Art Bottles:
Collect bottles to hold your art and set up paper funnels on top of each one.
Have each crafter use a large spoon to take scoops of each sand color, then put it inside their funnel. You’ll learn very quickly to be careful when carrying your spoon full of sand.
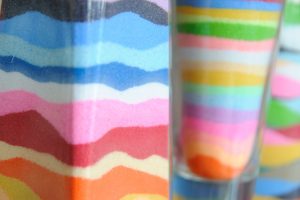
Alternate colors as desired to create lovely bands of color. We love a beach palette that includes sand, ocean, and sky tones, or customized to match the décor of your home.
When you get to the top, take out the funnel and fill the last colors to the very top of your bottle. It’s important to have as little air as possible between the sand and the lid, just so the sand doesn’t all get mixed up over time.
These bottles turn out absolutely beautiful, and even better – they are almost completely cost-free! We hope that you feel inspired to bring home some sand from your next beach vacation and create a permanent memento of those sun-soaked, peaceful moments by the sea. Let us know in the comments if you try this craft! We would love to see your results.


